
Today's topic is
 Know thy Quilt : patterns and templates: how to use them or modify them to suit you.

Patterns
We all have a different style of quilting... We love to experiment. But not everyone loves to do all the calculations required to design a quilt... Come on, deciding how much of each color fabric I'll require to make 264 HSTs might sound so overwhelming that I'd give it up before I start it!
So what do you do?
There are wonderful people out there who make work simpler for you...

They design the patterns along with the fabric calculations! They usually sell their patterns in print or pdf format. People like me who stay on the other side of the world, are glad for the pdf patterns! You get them within minutes of buying them!
You have searched the wonderful array of patterns, bought one and now how do you go about actually using a pattern?

First, check if the size of the quilt (not just the rough size - the exact size in inches) is what you are looking forward to make... If it is then congratulations, go buy the fabric (I'd suggest you buy a little more than stated - just in case you make some mistake while making it!) and start off...
But let us say, your pattern makes a quilt of 36" x 36" and you want to make one of 48" x 48"! How can you do that??
Here are a few tips to help you...

If the quilt is made up of blocks - just increase the number of blocks to give you your desired size.
Eg. If there are 9 blocks of 12" x 12" that make up the 36" x 36" quilt, making the larger one will just be making 16 blocks instead!
But its not always that easy....

Sometimes quilt patterns have sashing... In that case, you might think of changing the width of the sashing to make minor size changes. If not, you can increase or decrease the number of blocks and make necessary adjustments...

But sometimes, you will have to rework the entire block size! But remember that this will involve a huge change in the calculation of the fabric required too!
I once had to face that and instead of making all those changes in the pattern, I just changed the size of the quilt I was making!
Or you could choose another pattern too!
But do not forget to give proper credit to the pattern maker and never say you "designed" it. They have put a lot of hard work into it and you should respect that. If you have bought a pattern - it is meant for personal use... You cannot sell stuff made from pattern. Yes you can make commission quilts, but please dont mass produce stuff with other people's patterns without first asking them if it will be okay.
The same goes for tutorials. Do not think that just because it is free you can misuse it. There are no less efforts put in the free tutorials available on the internet. So give proper credit to those who do the hard work and be nice to them! They deserve it.
Templates
Different types of templates are used for quilting. Templates for handpiecing and applique are cut to the exact size of the finished shape while for machine piecing a 1/4" seam allowance is kept.
By using a template you can reproduce an exact shape or pattern as many times as you need.
The material used for making the templates should be such that it will withstand a lot of repetitive use. You could use plastic, cardboard, card paper or metal!

Plastic has several advantages over the others. It is transparent allowing you to trace directly and it is hard wearing which means that templates can be reused.

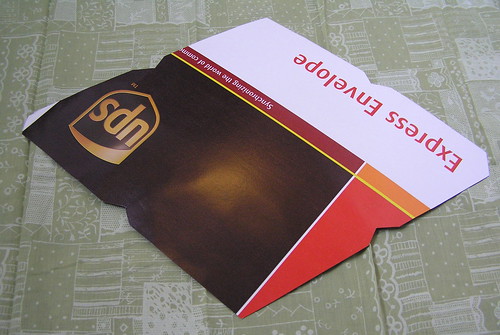
If you are using card board or card paper (recycled envelopes or cereal boxes work too) give the edges a coat of varnish (have a shade of nalpaint that you dont really like? - use it here!) to increase its life!


Tomorrow, I'll give you a whole list of places where you can find patterns and tutorials!
Till then, have fun!!
Cheers!!!

Patterns
We all have a different style of quilting... We love to experiment. But not everyone loves to do all the calculations required to design a quilt... Come on, deciding how much of each color fabric I'll require to make 264 HSTs might sound so overwhelming that I'd give it up before I start it!
So what do you do?
There are wonderful people out there who make work simpler for you...

They design the patterns along with the fabric calculations! They usually sell their patterns in print or pdf format. People like me who stay on the other side of the world, are glad for the pdf patterns! You get them within minutes of buying them!
You have searched the wonderful array of patterns, bought one and now how do you go about actually using a pattern?

First, check if the size of the quilt (not just the rough size - the exact size in inches) is what you are looking forward to make... If it is then congratulations, go buy the fabric (I'd suggest you buy a little more than stated - just in case you make some mistake while making it!) and start off...
But let us say, your pattern makes a quilt of 36" x 36" and you want to make one of 48" x 48"! How can you do that??
Here are a few tips to help you...

If the quilt is made up of blocks - just increase the number of blocks to give you your desired size.
Eg. If there are 9 blocks of 12" x 12" that make up the 36" x 36" quilt, making the larger one will just be making 16 blocks instead!
But its not always that easy....

Sometimes quilt patterns have sashing... In that case, you might think of changing the width of the sashing to make minor size changes. If not, you can increase or decrease the number of blocks and make necessary adjustments...

But sometimes, you will have to rework the entire block size! But remember that this will involve a huge change in the calculation of the fabric required too!
I once had to face that and instead of making all those changes in the pattern, I just changed the size of the quilt I was making!
Or you could choose another pattern too!
But do not forget to give proper credit to the pattern maker and never say you "designed" it. They have put a lot of hard work into it and you should respect that. If you have bought a pattern - it is meant for personal use... You cannot sell stuff made from pattern. Yes you can make commission quilts, but please dont mass produce stuff with other people's patterns without first asking them if it will be okay.
The same goes for tutorials. Do not think that just because it is free you can misuse it. There are no less efforts put in the free tutorials available on the internet. So give proper credit to those who do the hard work and be nice to them! They deserve it.
Templates
Different types of templates are used for quilting. Templates for handpiecing and applique are cut to the exact size of the finished shape while for machine piecing a 1/4" seam allowance is kept.
By using a template you can reproduce an exact shape or pattern as many times as you need.
The material used for making the templates should be such that it will withstand a lot of repetitive use. You could use plastic, cardboard, card paper or metal!

Plastic has several advantages over the others. It is transparent allowing you to trace directly and it is hard wearing which means that templates can be reused.

If you are using card board or card paper (recycled envelopes or cereal boxes work too) give the edges a coat of varnish (have a shade of nalpaint that you dont really like? - use it here!) to increase its life!
How to make a plastic template?

Step 1 : Trace the shape through the plastic with a sharp soft pencil. Measure and mark a 1/4" seam allowance if required. (In case you are using card paper - using a carbon would be a great idea.)
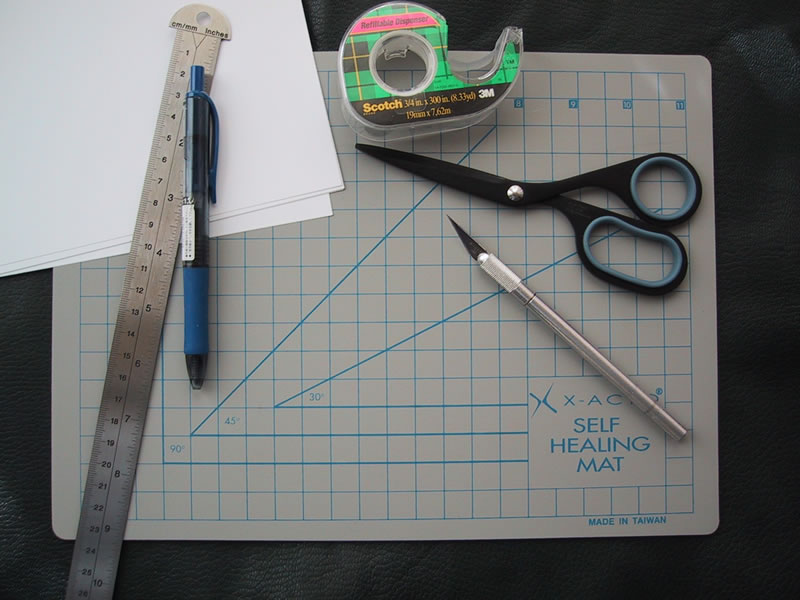
Step 2 : Use a metal edge ruler and a craft knife to cut your template. Hold the ruler very firmly to prevent it from slipping. In case of curves, use short firm strokes to cut.

Step 3 (Only for window templates) : Score very carefully along the inside lines of the template. You may have to score along each line several times to cut right through.

Till then, have fun!!
Cheers!!!

Post a Comment
Thank you for your comments... I try to reply to all of them personally, but sometimes life is just too fast to do that... But I love hearing from you...