SOCIAL MEDIA

Saturday, July 15, 2017

Aurifil Block of the Month - July - Shruti Dandekar (Me!!!!)

Hiya there!!!

Its my turn on the color wheel!!! And I am super excited. Especially since my color is my favorite - actually my brand color - Orange!!!


Head over to Auribuzz to read my interview and also to download my fun pattern!

I have used the same Reverse Applique technique that has been used to make numerous quilts!!!

The first time I used it to make a pillow.


Then I tried it to make my Harry Potter Quilt


And then, I used it for portraits!!!

First was the iQuilt for my little brother


After that I wrote my eBook. ABOUT face! That will teach you step by step how to use it to make a portrait quilt! You can buy it in my craftsy store.


I made a portrait of Alex Veronelli for my book! We met up at QuiltCon 2015 where I gifted it to him!!! 


Since then I have made numerous more. Some for myself, like my self portrait. 


It is a very versatile technique and I have been thinking of expanding it to many more designs... Let us see where it leads me to!!!

Cheers!!!


www.fatquartershop.com


Sunday, August 30, 2015

Why quality matters?

"Why don't you use cheaper material to make my quilt?"

I get asked a lot of variations of this question when I take custom orders and my customers hear the price I am quoting.

I have already done a post about pricing, if you haven't read it, I urge you to go back to it and read.

When I started quilting, I knew nothing about sewing machines, thread or fabrics!!! It took me a long time and a lot of hard work to figure out what works best for me. One by one, today I will explain why I wont use something that is cheaper to make something for you. It matters to me that you all understand it. Because, I believe, it is important.

First up : Sewing Machines!!!


I had my grandma's treadle - Durby -  and I was absolutely happy with it. I thought I had the best machine in the whole world. Then I bought the Bernette e56 - Betty- and I was on top of the world! Of course it had to be the best sewing machine in the world! I paid a lot of money for it! But then I got the Bernina 330 - my awesome Emily - and I realized how much better my stitching got with the better machine. Yes, I had a lot of experience by then, but also yes, the machine made a difference, Once again I thought I would never need a better machine than that! So when I ultimately found my soulmate Ross (My Bernina 710) I do not expect him to be the best machine in the world! I know that before I know it, I will be thinking about an upgrade. I have used a lot of different brands, but the hassle-free operation and maintenance of the Bernina plus its user-friendly interface has made me stick to it long before I became the Brand Ambassador for them.

Second : Threads


It was the same with the threads. When I started out, I just bought 'thread'. I didn't even know there were any other factors apart from colour to consider! But 5 years in the quilting world has made me a lot wiser. I have tried A LOT OF threads. Right from unkown local manufactured spools to my latest obsession, Aurifil. I used to have a lot of tension issues and blamed my sewing machine before I laid my hands on this awesome made-in-Italy-Egyptian-cotton spool of goodness. Its not that I do not use any other brands, I do. But I only do so if I do not have a spool of Aurfil in the colour and weight I need. After I used Aurifil for the first time in September 2012, I realized what I should look for when I buy a spool of thread. Its not just the colour. It is the way it has been woven that determines if I am going to break it often or have tension issues. I started looking at all the threads I use differently. I prefer cotton, mainly after I had to iron a totally crumpled linen pouch on a 'cotton' setting on my iron and doing so just burnt all the poly thread that I had used to do the quilting! I also need to be sure that the colour of the thread does not run! I learnt that one from experience too! A beautiful pink-grey quilt for a little girl has shocking pink 'highlights' throughout the quilt! When I use Aurifil I do not have to think about all the issues. I know that they have been thought of, by the company!

Moving on to : Fabrics


Fabric is, of course, my favorite of all the supplies i need to make a quilt! And yes, it is the most important one and also plays the major role in making a quilt what it is.

When I started out, like I have said a million times before I didn't know anything about fabrics. In fact I started out as an 'up'-cycler! I took old clothes and made them into something useful. I got to play with a lot of different fabrics. With every item I made (it was not just quilts then) I learnt a little bit about what I should do and what I should not. It was a long road filled with many failed attempts. But in the course of 5 years, I have come a long way and today I can tell the quality of fabric by feeling it.   I had seen a lot of people do that in a fabric shop before I started quilting, I did it too, but never really knew what they (or I) were doing. But now i can.

I prefer buying solids here in the local fabric shops. One - they come in a lot more colours than the branded ones. And two - its easier and better to match colours to actual fabrics than to screen images. I usually take along a few wet wipes. I rub them onto the fabric in a discreet corner to test for colour fastness. Indian fabrics are notorious for bleeding colours! I have observed that the Umaid mills Poplin usually runs less. But any brand I buy, its the pinks and the turquoise ones that bleed the most. So I usually soak them in colour fasterners. My FIL used a mixture of Salt and Jaggery. I have tried that and it works as good as the store bought colour fastners.

I buy a lot of prints here in India, but I love the designer prints that I order online. For prints that I buy in India, I always check for mis-prints. That seems to be an issue with a lot of cheaper print fabrics available. Also a lot of it is garment weight - that is a lot lighter than I need for quilting. So I have to take all these things into consideration when I buy fabric. And price is the last thing on my mind when I do that.

I want my customers to love my quilt as much I do. I spend a lot of time thinking about the quilt and dreaming about how i will make it and what it will look like. It feels like nurturing a baby! And like any other parent I only want what is the best for my baby! I cannot compromise on the quality of the supplies that I use. If you are a dear friend or a returning customer, I sometimes will compromise on the 'making charges' of my quilt to make it more affordable to you, but NEVER on the quality of the material.

Even if you are okay with it, I am not!
And I will NOT use cheaper material just so that a lot more people can buy it.
www.fatquartershop.com


Saturday, May 30, 2015

Tutorial : World's Easiest Tote Bag

I made these two tote bags from the fabric left over (I still have a lot more of the fabric) from the Sassy Modern Quilt you can see in the background.

They were so quick and easy to make that I just had to write a tutorial for them for you all.

The tutorial is also available as a PDF download on the Bernina Blog that I am an author on.

So here's a tutorial for the World's Easiest Tote Bag!!!

The tutorial also includes making a zipper pocket and some wonderful bag handles!


Finished Size : 12” x 4” x 18”

Material required
Outer Main Fabric -  ½ Yard
Outer Cuff Fabric - Fat Quarter
Lining Fabric - 1 Yard
Batting - 18” x 42”
Lightweight Interfacing - 18” x 42”
1 ½ “ Webbing - 72” long
Zipper - 7-8”
Magnetic Snap - 1 No
For your sewing machine
Foot No 1D (For the 7 series) or Bernina Walking Foot
Zipper Foot
Stretch Needles – I prefer using Stretch Needles when I have to stitch multiple layers. I find it gives me a better finish then using the ‘Universal’ Needles.
Thread – I suggest using a strong cotton thread. I use 40 wt Aurifil Thread to stitch bags. I find it has better strength to hold together the multiple layers as compared to regular 50 wt thread.

Cutting Instructions
From your Outer Main Fabric (F)
Cut     F1    14” x 17.5”    2 Nos
From Outer Cuff Fabric (C)
Cut     C1    6” x 17.5”    2 Nos
From Lining Fabric (L)
Cut     L1    1.5” x 17.5”    2 Nos
    L2    3.5” x WOF    2 Nos
    L3    9” x 7”        2 Nos
    L4    11” x 7”        2 Nos
    L5    20.5” x 17.5”    2 Nos
From the webbing, Cut 2 pieces 36” long
From the Batting
Cut    B1     21” x 18”    2 Nos
From the Interfacing
Cut     I1    21” x 18”    2 Nos
 

Instructions
Step 1 : Making the Bag Straps
Take your lining pieces – L2  (3.5” x WOF) – and the two Webbing pieces.
Fold the lining pieces in half and then again to make double fold tape.
Cut it to 36” length.
Attach the Foot No 1D (and lower the Dual Feed System) or attach the walking foot to your machine.
Align the tape to the webbing along the center and start top-stitching the open edge.


Continue stitching along the entire edge.
Repeat on the other side.
Repeat for the other strap.
Your straps are ready.


Step 2 : Preparing the outer shell
Lay one of your Outer Main Fabric piece – F1, Right Side Up, on one of your Batting piece – B1, aligning one of the 17.5” side to the 18” side of the batting.
Pin in place.
Take your Lining Fabric piece – L1, Right Side Down, and align it to the other 17.5” size of F1.
Pin in place.


Stitch along the edge.
Open and press.
Now, mark 4” from both the ends, as shown.


Align the strap prepared in Step 1, Right Side Down, with its outer edge adjacent to the mark.
Take care that the strap is straight.


Pin or baste in place.
Now lay your Outer Cuff Fabric piece – C1, Right Side Down, and pin along the 17.5” edge.


Stitch along the pinned side. Backstitch over the straps for added strength.
Open and press.


Carefully, top-stitch 1/8” near the seam.
Be extremely careful when you reach the strap. It has multiple layers and can break your needle.

Baste stitch on all four sides using the longest stitch on your machine. DO NOT STITCH DOWN THE STRAPS.
Your Outer Panel is ready.
Repeat the steps for  the other Outer Panel.
Lay both the outer panels Right Sides Together.
Pin along both sides and bottom.
Stitch along the pinned edges.
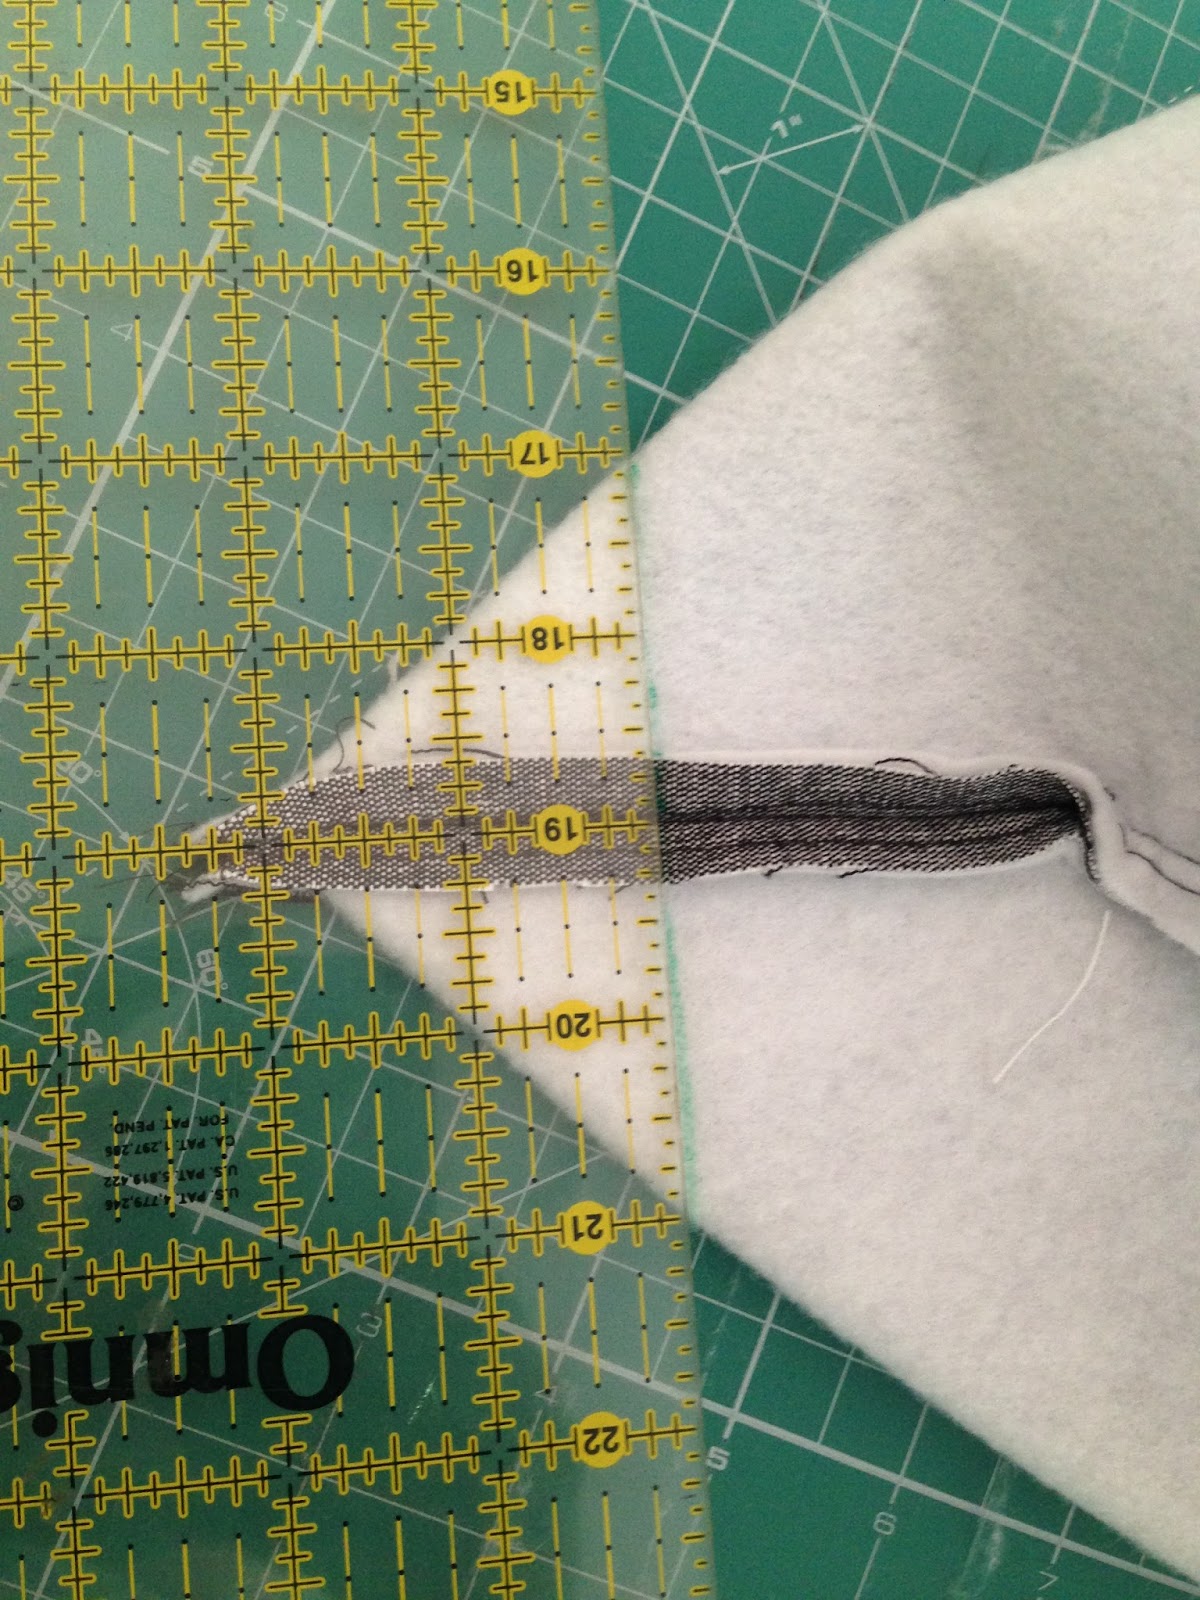
To box the corners align the seams by folding the corners at 45” as shown and marking a line 2” from the corner.


Stitch along this line. Cut off the extra corner.
Repeat for the other side.
Turn the bag Right Side Out.
If you want you can iron on some Stiff Interfacing to the bottom of the bag.


Your Bag Outer Shell is ready.


Step 3 : Making the Lining Shell
Note : One side of our lining has a zipper pocket and the other has a regular open pocket. Making these pockets is optional. You can directly skip to putting together the Shell if you do not want to make these pockets.
First Iron on the Interfacing pieces –I1, to the Wrong Side of the Lining Fabric pieces – L5.


Zipper Pocket:
Align one of the Lining Fabric Pieces – L3, with the center of the 17.5” size of the Fused Piece L5 at about 4.5 – 5” from the TOP edge.
Pin in place.
On the Lining Piece L3, mark a rectangle 0.5” x 7.5” – at 1” from the top edge (see photo below)


Stitch along the marked rectangle.
Using a sharp pair of scissors cut a line along the center of the rectangle making a Y-cut at both the ends. Be careful not to cut the stitches, but to cut at close to the seam as possible.

 
Turn the fabrics inside out through the cut so that they lie Wrong Sides Together.


Press the seams firmly. I recommend using steam or starch to hold the shape in place.
Place the panel on a flat surface, the Right Side of Pocket piece L3 facing up.
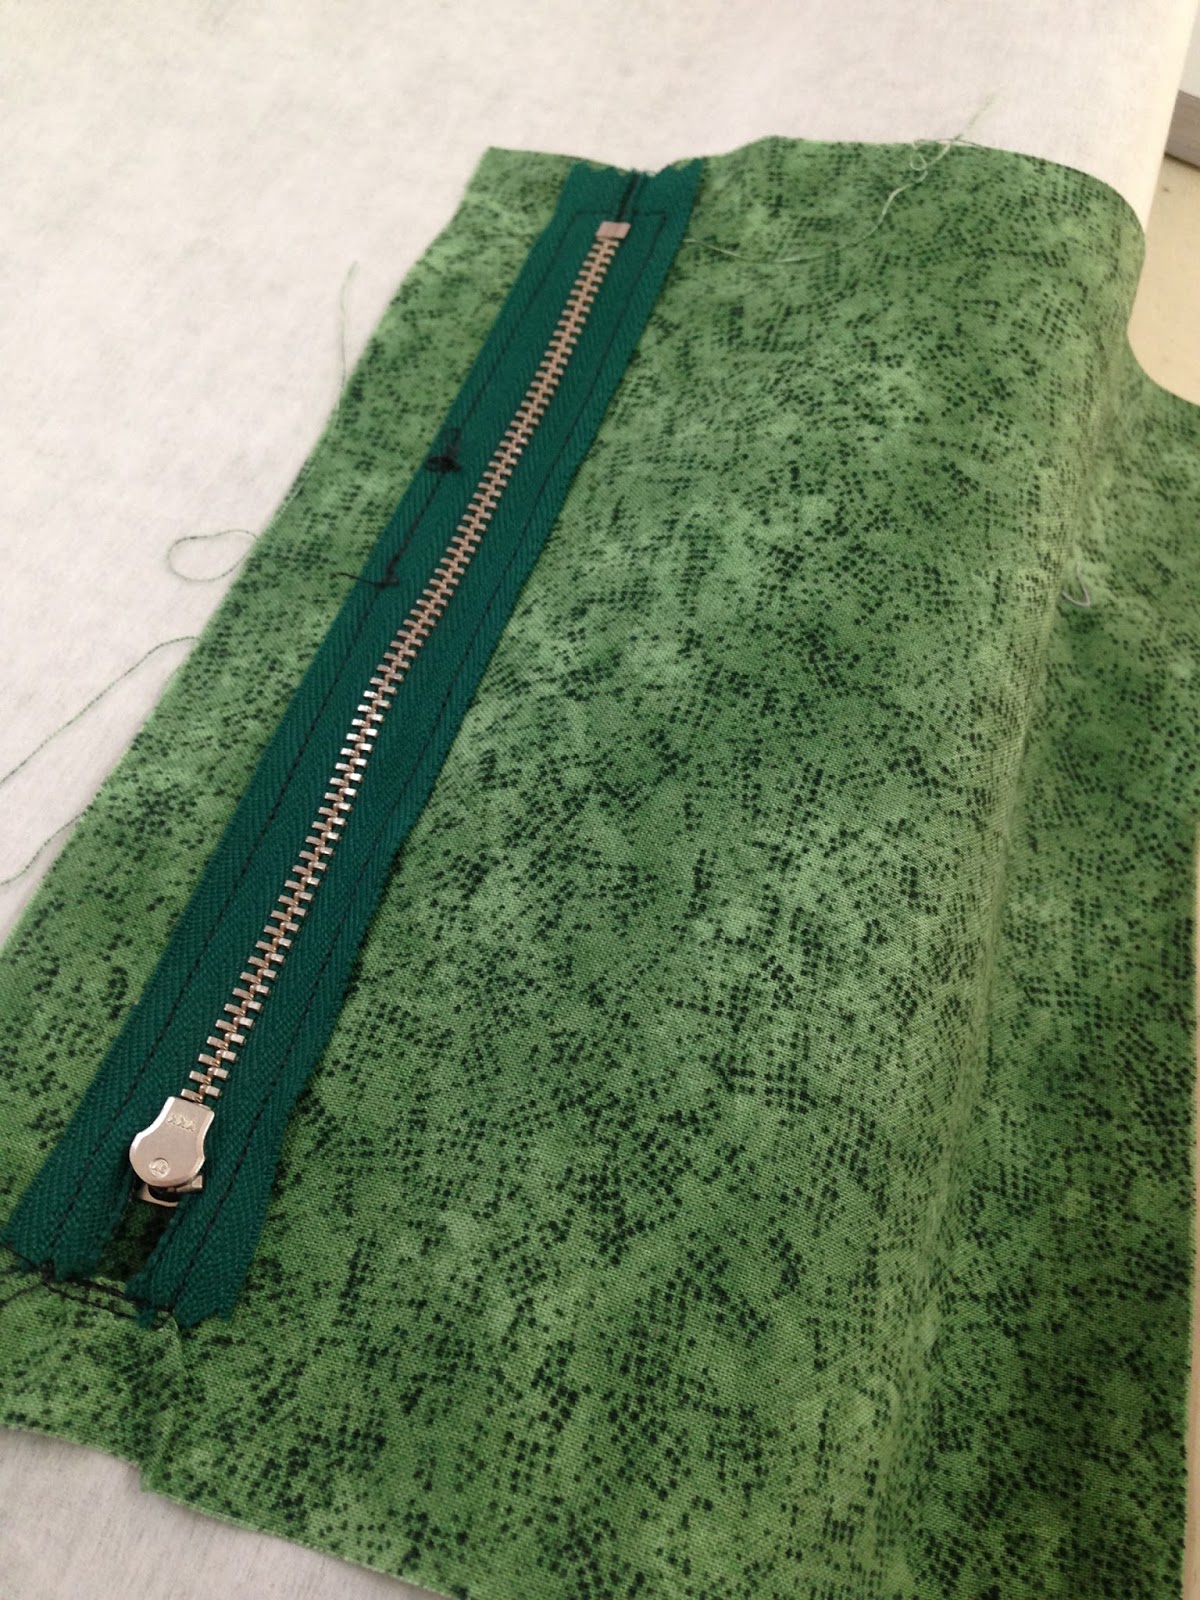
Align the Zipper – Right Side Down, along the opening. Pin in place.


Now attach the Zipper Foot to your machine and stitch the zipper in place by top-stitching along the edges of the opening.


Now, turn over the panel. Place the other Lining piece – L3 over the pocket piece Right Sides Together. Pin along the edges.
Stitch down the edges to finish the Zipper Pocket.
 
Regular Pockets
Take the 2 Lining Fabric Pieces – L4, Right Sides Together.
Pin along all four sides and stitch leaving an opening on 1 ½” to turn on one side.
Clip corners and turn the pocket Right Sides Out.


Top Stitch along one of the long edges. This will be the TOP edge.


Align the Pocket piece with the Fused Lining piece – L5, as desired.

I prefer aligning it at level with the zipper of the zipper pocket on the other panel.
Mark a line parallel to the shorter edge of the Pocket piece. This will make a compartment for a phone.
Stitch along the sides, the compartment line and the bottom to attach the pocket piece to the Panel. Make sure you back stitch at the top of the pocket for added strength.

Now trim down the excess Interfacing from the edges of both the Lining Panel.


Lay your Lining Pieces Right Sides Together, making sure that the directions are right. Pin along the edges and stitch along the sides and the bottom, leaving an opening of about 6-8” to turn the bag.


Once again, box the corners, following instructions in Step 1 above.


Your Lining Shell is ready.


Putting together the bag:
Insert your Outer Shell into the Lining Shell – Right Sides Together. Pin along the top edges.
Remove your extension table from the machine and use the Free Arm to stitch along the edge.


Turn your bag Right Side Out through the opening in the lining piece.


Attach the Magnetic Snap at the center of the Lining piece about 1.5-2” from the top edge.
Follow the manufacturer’s instructions to attach it.
Use clips to hold together the edge while you top-stitch the top edge. I like to use my Wonder Clips. Make sure you include the straps when you stitch.


I like to top stick again, at ¼” from the first stitch to add strength to the bag.
Close the opening in the Lining Shell by hand stitching or top stitching.
Your Tote Bag is ready to flaunt!

If you make a bag with this tutorial, do share pictures with me so I can share them on my Facebook Page

Do you like the Tote? And do you also find it to be the easiest Tote in the world?

Cheers!!!

www.fatquartershop.com