SOCIAL MEDIA

Saturday, July 15, 2017

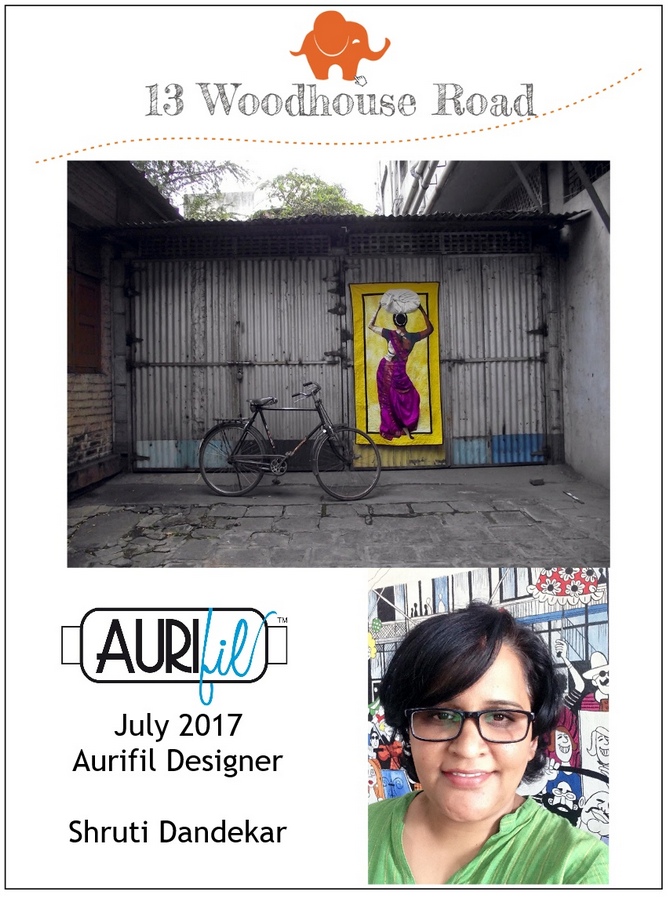
Aurifil Block of the Month - July - Shruti Dandekar (Me!!!!)

Hiya there!!!

Its my turn on the color wheel!!! And I am super excited. Especially since my color is my favorite - actually my brand color - Orange!!!


Head over to Auribuzz to read my interview and also to download my fun pattern!

I have used the same Reverse Applique technique that has been used to make numerous quilts!!!

The first time I used it to make a pillow.


Then I tried it to make my Harry Potter Quilt


And then, I used it for portraits!!!

First was the iQuilt for my little brother


After that I wrote my eBook. ABOUT face! That will teach you step by step how to use it to make a portrait quilt! You can buy it in my craftsy store.


I made a portrait of Alex Veronelli for my book! We met up at QuiltCon 2015 where I gifted it to him!!! 


Since then I have made numerous more. Some for myself, like my self portrait. 


It is a very versatile technique and I have been thinking of expanding it to many more designs... Let us see where it leads me to!!!

Cheers!!!


www.fatquartershop.com


Tuesday, July 12, 2016

What to expect...

I have mustered all the courage I have and sent off emails to a lot of people telling them that I am interested in teaching at their guild/retreat/shop... actually anywhere that people (if any) are ready to come and learn from me!!!

So, I thought it would be good to write a post about what you can expect if you invite me to teach.

I do teach a number of classes locally (in India), but for the international ones, I have chosen two that I feel reflect my best works! 

So first up, ABSTRACT Expressions


This quilt is inspired by the work of the Canadian artist Martina Shapiro. The process of making this quilt was just so much fun that I had to share it with others!

The plus point

This is a GREAT workshop for beginners!!! If you can sew a straight line, you can do it!
You DO NOT need to be an artist!!! No sketching/drawing/painting experience necessary!!!


I conduct this workshops in two formats.
First is the TWO day format. Here is how it goes :

This workshop is divided into four quarters. In the first quarter, we will be talking about basics of Expressionism and Fauvism. We will also discuss the basics of portraiture and the effects of light on the faces. 


We will then spend some time getting acquainted with the process of portraits by Martina Shapiro. Playing with acrylic paints comes next before lunch time!

By the end of the first quarter the students will have made an abstract portrait in paint.


This is the time when people start having a little confidence in themselves (and me). 

In the second quarter, we will begin working with fabric. And by the end of the first day, we will be done creating the outline of the face the students will make into a quilt.


On the second day, students start working on the colors of the face. This is the most interesting process, as they think about colors and the way they blend. It is absolutely fascinating to see how faces and their expressions evolve! And this part of the workshop gives me pure joy!!! 


At the end of the two days, the class  leaves with  completed portrait quilts. Each quilt is unique and I find that more often than not, you can find a glimpse of the maker in their quilt! By this time, the fears of making a 'portrait' are all gone and people are already wondering what their next portrait will look like.


I also have a shorter version of this class that I conduct. I do prefer the TWO day format though. It makes it fun for the beginners as well as the experienced quilters!

In the ONE day class, We skip the painting part. The students just sketch the portraits in their notebooks and get started on the fabric portrait. Also, we discuss the details about Expressionism and Fauvism while the students work on their portraits instead of keeping dedicated time for it.

This class might feel a little rushed for some people, but they can always get in touch with me via email if they have any doubts.

In both the classes, I have also (now) prepared handouts that I give to the students for them to understand the process better.

Click here to download the supply list for this class.

Now we come to my second class ABOUT face


This class is based on the REVERSE Applique technique that I teach in my eBook ABOUT face.

It is my claim that this is the fastest method one can use to make a portrait quilt. You DO NOT have to be an artist. You DO NOT need to know how to draw.


How fast, you want to know - It took me 3 months of working 3-4 hours of work everyday (it amounts to about 270 hours) to make the portrait of Dada Ajoba. But the iQuilt, which has 3 shades, took me just 7 days with 1-2 hours of work everyday (about 10-14 hours) and the Alex Veronelli quilt, with 5 shades, took me 3 weeks with 5-6 hours every WEEK (15-18 hours). Can you make a portrait quilt faster than that?

If you know how to do 'follow the lines' Free Motion Quilting, and you wish to make a portrait quilt. This is definitely the class for you. 

The first quarter will be all about taking/ selecting  photographs, editing and printing them. By the end of the first quarter we will finish copying the image onto the base fabric.


In the second quarter, we will be stitching the design and we will start cutting away unwanted fabric, revealing the design underneath.


This is a class where the students are much more busy than I am!!! As they cut away layer(s) of fabric, they are simply overjoyed to see their portraits taking shape! By the end of the third quarter the design will be all cut away!!! And the quilt top will be ready!


In the last quarter, the students will learn how to quilt the face so that they can enhance their work even further.


At the end of the TWO day workshop, the students will leave with a finished portrait quilt of about 24" x 30" in 2-3 colors.

I guarantee that you will finish the quilt if you make it in 2 colors. But if you want to make a  quilt  in 3 colors, you might have to go home with just the quilt top (finished) and you can continue doing the FMQ at home.


If you need any more information about my workshops, please feel free to email me.


www.fatquartershop.com


Wednesday, April 27, 2016

52 prompts to blog every week: Week 17


I am a self taught quilter. There are techniques that I have learnt myself, ones I have learnt from the net, ones learnt from others at quilt meets and Quiltcon, some I have dreamt about and then a few more...

Of all of them, I love the technique I use in my book,'About face' the most. Its a kind of reverse applique, but then, not quite so!

I used it for the first time in my Harry Potter quilt.


I have made portraits with it and written a book and taught classes, both online and in person.

The first portrait I made using the technique was that of Steve Jobs. I made the iQuilt for my little brother. 


And then I also made this portrait of Alex Veronelli of Aurifil Threads! He was brave enough to be the subject for my eBook. I had the pleasure of meeting him at Quiltcon and handing over the quilt I made for him!


I have been taking classes to teach this technique, both online and in person. My students have come up with brilliant works of art!!!

And I'm really proud of them.

Here are my students at the Bernina Creative Center, Mumbai.


So this is that one technique I love and cherish the most.

Here's a small tutorial.

Supplies : Fabric - minimum 2 of the same size, thread (that matches either of the fabrics), a pair of SHARP scissors (I love my stork scissors for this one), seam ripper, temporary fabric marker.

1. Draw the design onto the topmost fabric. I suggest you take the lightest fabric on the top.


Now using the thread, I use Aurifil monofilament thread, and your FMQ foot, stitch through all the layers of fabric. Use a small stitch length. On my BSR I use a stitch length of 1 - 1.5.


Now use your seam ripper and/or your sharp scissors to cut away the layer(s) according to your design. Take care to cut as close to the stitch line as possible.


I use the seam ripper for tinier areas that I need to cut away.


Here's the result :  On the top is my reverse applique piece and on the bottom is the original print.


If you want to know more about creating portraits using this technique, I would highly recommend my own book (how modest!).

You can buy it here at Fat Quarter Shop

Which is your favorite technique? Do share about it so that we can all get to know it!

Cheers!!!


www.fatquartershop.com


Tuesday, December 9, 2014

Sew Mama Sew! Giveaway Day!!!

Hi all!
Its that day of the year! Yes! The BIG Giveaway Day at Sew Mama Sew.
And I am participating.


I will be giving away ONE copy of my eBook

ABOUT face : Portrait Quilts using the Reverse Applique Technique


To enter you just have to go to Facebook and 'like' my page!
13 Woodhouse Road on Facebook
Thats it! Like it and leave a comment that you've done that!

If you already 'like' me, leave a comment telling me so!

I will draw a winner on December 12, 2014 at midnight PST!!!


Thursday, November 27, 2014

A book release and BERNINA ambassador!


Wow!
This  week has been totally awesome!

The highlight of the week is something I have been working on for almost 6 months now!

My first ebook!!!

Yes!

I'm nervous, excited, anxious, happy, scared, delighted, and utterly terrified ALL AT THE SAME TIME! I never would have thought you could be all those things together!

So here's presenting to you, my first ebook

ABOUT face : Portrait quilts using reverse applique technique!


 Alex Veronelli of Aurifil generously agreed to be the subject for the book! I loved making his portrait! I'm calling it Mr. Aurifil!


The quilt itself is @36" x 36"

I have used Aurifil monofilament thread, both white & smoke to put together the quilt top and Aurifil #50 and #40 threads in assorted shades of Grey to quilt it. I have used 5 shades of fabrics from Kona cottons and Ross (my Bernina 710) had absolutely no trouble sewing through all the layers!


 Writing an ebook was a super experience! I have no idea how people are going to receive the book! But I'm doing it for me! It will make me happy! 


I am really proud of my work, as well as the fact that I came up with this technique by myself. Making portraits using applique is a pretty common but highly time consuming method. I wanted something that is quicker! And this book will teach you how to make Portrait quilts, quickly! Want to know how quickly?

Well, Dada Ajoba's portrait took me 3 months with about 3-4 hours of work everyday (do the math). But Steve Jobs took me a week with about 1-2 hours every day (@10-14 hours). Alex took me 3 weeks with about 5-6 hours every WEEK! (@15-18 hours)

Go buy the book in my Etsy shop here! Or click the "My Etsy Shop" button on the bar above!


Quilt Stats
Name : Mr Aurifil
Size : 36" x 36"
Material : Fabric - Kona cotton - PDF Bleach White,Silver, Ash, Steel and Jet Black.
Backing fabric - Block Printed Indian Cotton from stash
Tulle
Thread - Aurifil monofilament Clear & Smoke
Aurifil 50 & 40 weight White, Dove, Grey, Very Dark Grey and Black 
Technique : Reverse Applique
Experience : Ranging from utter helplessness to ecstasy!!! Making the quilt was totally awesome, writing the book was, at times, terrifying!


And now coming to the second part of why this week is awesome!

I have been chosen as a BERNINA Ambassador! It is a HUGE honor! I have always loved Bernina and right from the first machine that I bought, I have been amazed by not just the quality of the machines, but also by the excellent service provided by Bernina India - specifically Mr. Ajay Gupta.

Be it my Bernette e56 (the lowest machine on the price ladder) or my 710 (somewhere near the top), they have been equally attentive and have always advised me generously. I still remember my call to Mr. Gupta when I was looking to buy a new machine. I told him my budget and then asked his advice about which machine I should buy, and he told me not just the features and limitations of the Bernette e56 that I ended up buying, but also of the machines of the other brands within that price range. Every trip to Mumbai, now, includes a heart to heart conversation with him where he guides me like an elder brother would guide his sister. He has been supporting and encouraging me right since when I was a novice! He believed in me even when my own belief was breaking down into pieces. 

And now, to be made a BERNINA Ambassador!!! Wow! You will find me blogging on the official BERNINA international blog very soon. I am actually working on my first project to be put up there, right now!